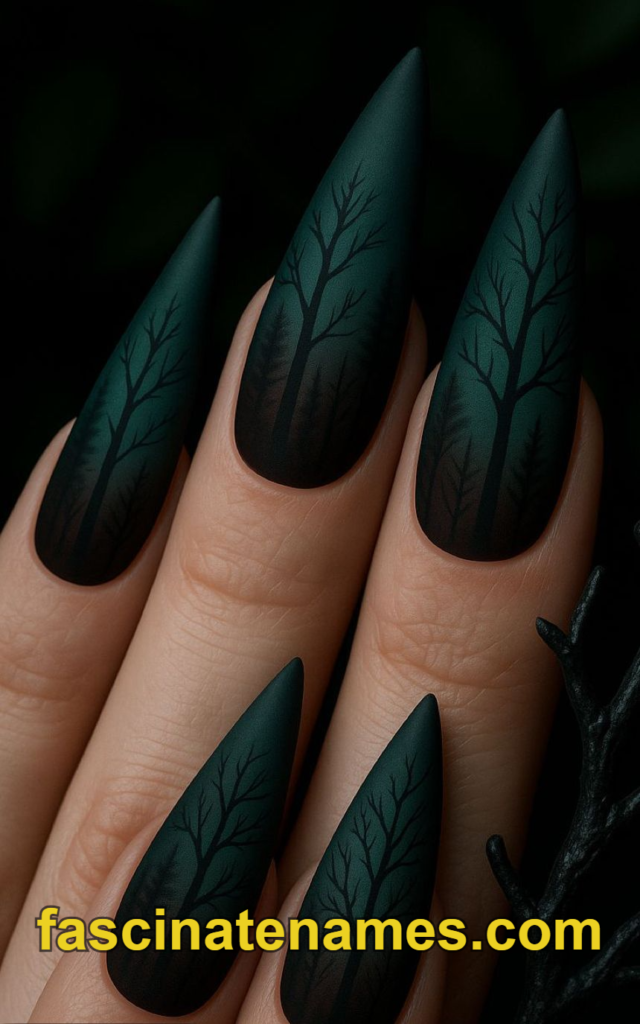
Few images say “Halloween” like a twisted, leafless tree standing against a glowing moon. That eerie silhouette translates beautifully to a tiny canvas, which is why the Halloween spooky nail tree has become a favorite for people who want something more atmospheric than pumpkins and ghosts. This guide covers 20 topics to help you plan your own look, from design ideas and color palettes to step-by-step drawing tips, tools, and nail care. Whether you are a beginner with a toothpick or a seasoned nail artist, you will find something to try.
1. What Is a Halloween Spooky Nail Tree Design?
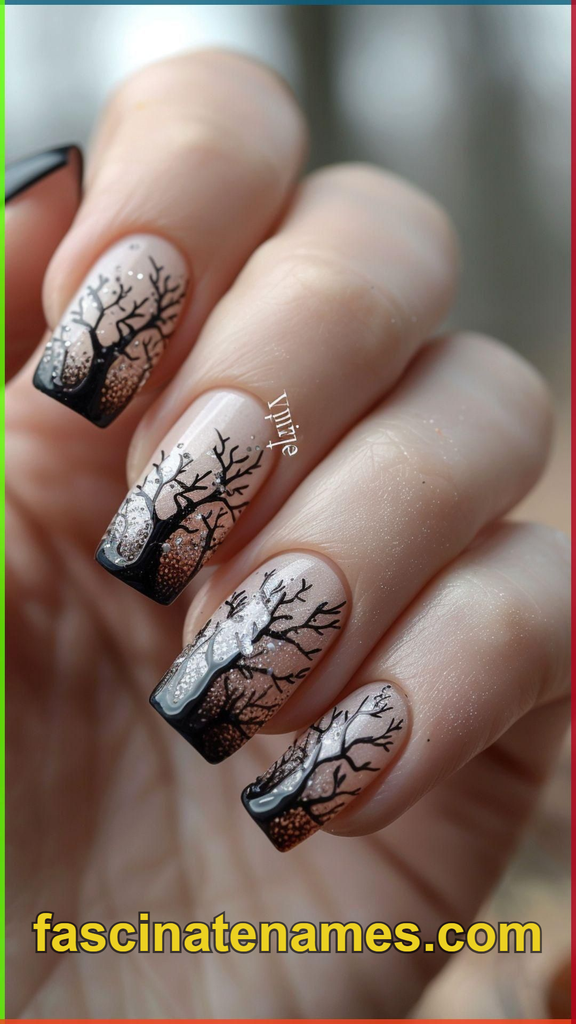
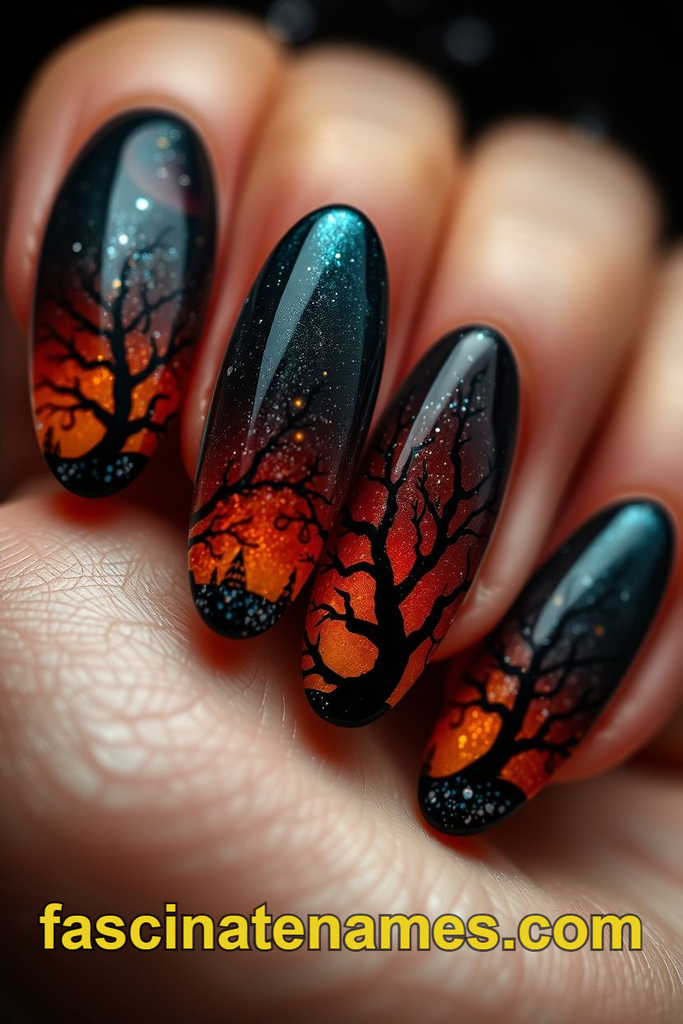
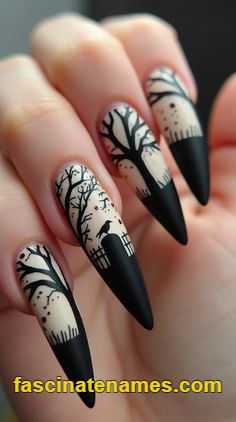
A Halloween spooky nail tree design is any manicure that features a bare, gnarled, or haunted-looking tree as its main artwork. The trees are usually painted in black against a moody background such as a sunset, a foggy sky, or a full moon. Because the branches are drawn with thin, tapering lines, the style looks graceful and eerie at the same time.
Unlike cartoon Halloween motifs, tree nails lean toward a gothic, storybook mood. They suggest abandoned forests, old graveyards, and misty October nights. The style is also flexible. You can paint one small tree on a single accent nail or connect a whole forest across all ten fingers. Some people also use the phrase “nail tree” for a practice stand that holds nail tips, which we cover later in this guide.
2. Why Spooky Tree Nails Are Trending This Halloween
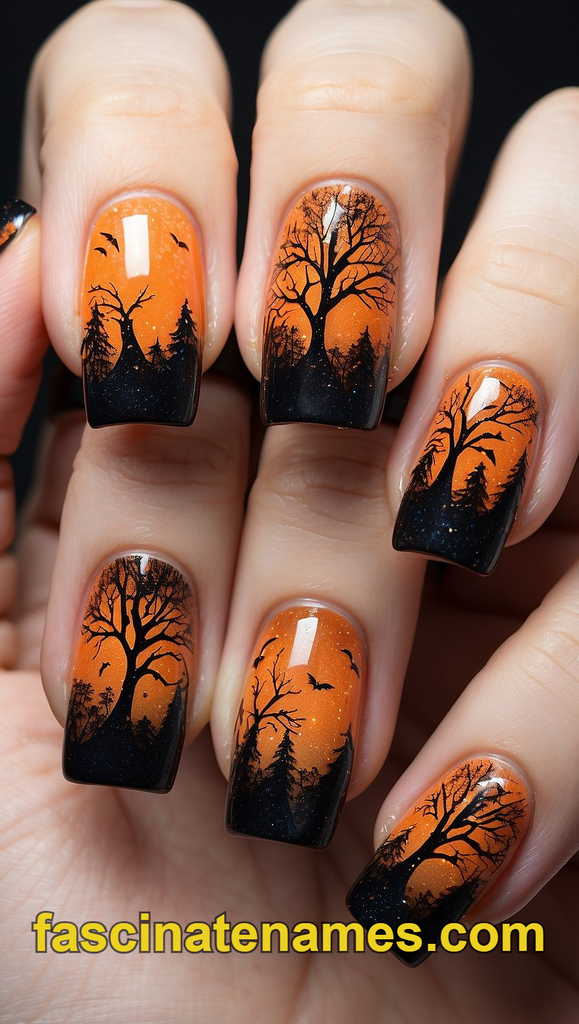
Tree nail art is popular because it feels sophisticated without being complicated. The silhouette style photographs well, and the strong contrast between black branches and a colorful sky makes each nail look like a miniature painting. Social media users love close-up nail scenes, and tree designs tell a story in a very small space.
Another reason for the trend is wearability. A branch line on a sheer base looks subtle enough for work, while a full haunted forest works for a party. Tree designs also carry through the whole autumn season, since bare branches suit October, November, and even early winter. That means your manicure does not have to disappear the day after Halloween. If you want a look that is spooky but still stylish, a Halloween spooky nail tree is a smart choice.
3. Bare Branch Silhouette Nails
The bare branch silhouette is the foundation of every spooky tree manicure. Start with a solid or gradient background, then use a fine detail brush to paint a slightly curved trunk. From the trunk, pull out branches that split into smaller twigs, keeping the lines thinner as they move away from the base.
The secret is imperfection. Real dead trees are twisted, uneven, and asymmetrical, so avoid making both sides match. Let one branch reach farther than the others, and add a few tiny crooked twigs for character. Black polish is the standard choice because it contrasts with nearly any background color. A single silhouette on each nail creates a cohesive set, while one tree that grows across two or three nails gives a more dramatic effect.
4. Haunted Forest Sunset Gradient Nails
A gradient background instantly makes tree nails look more cinematic. The classic haunted forest look uses a sunset fade from orange at the tips to deep purple near the cuticle. Some people prefer a gray to black gradient for a stormier, foggier sky.
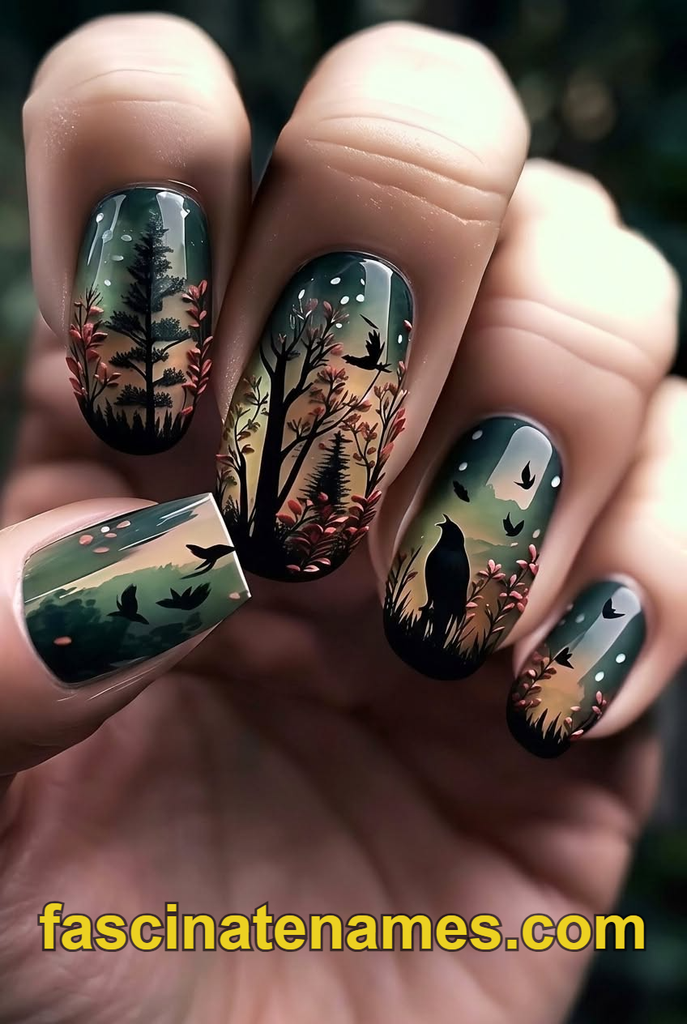
To create the gradient, dab two or three polish shades onto a makeup sponge and press it onto the nail, repeating until the colors blend smoothly. Let the gradient dry completely, then add a black tree line along the bottom of the nail to suggest the horizon. Add a few thin trunks of different heights to build a forest. You can finish with tiny bats flying across the sky. A glossy top coat gives the sky a glassy finish, while a matte top coat makes the trees look softer and more vintage.
5. Full Moon and Dead Tree Nail Art
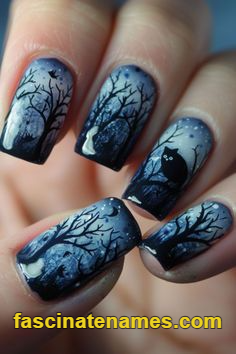
The full moon and dead tree combination is a Halloween classic. Begin with a deep navy, midnight blue, or black base. Use a dotting tool to press a pale yellow or white circle onto the nail for the moon. Wait until it dries, then paint black branches so that a few of them cross in front of the moon.
The overlap is what sells the effect, because it makes the moon look like it is glowing behind the branches. Add tiny white dots for stars or a small bat silhouette near the moon. For extra glow, brush a bit of shimmer polish around the moon’s edge. This design works best on an accent nail, since the large moon needs space. Pair it with simple dark nails on the other fingers to keep the focus on the scene.
6. Graveyard Tree Scene Nails
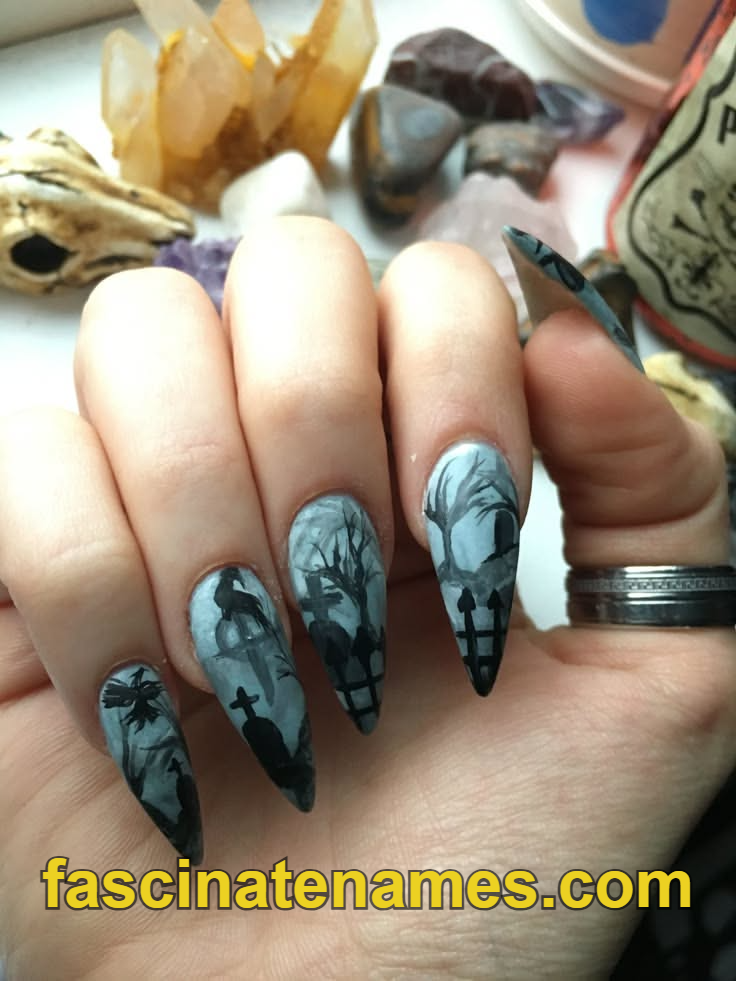
A graveyard scene turns your nails into a tiny horror movie set. Paint a foggy gray gradient, then add a leafless tree, a few small tombstones, and perhaps a crooked fence line at the bottom. Keep the tombstones simple, with rounded tops and short lines suggesting cracks.
To create mist, dab a makeup sponge into sheer white polish and gently tap it over the lower part of the nail, near the ground. This softens the edges and gives the impression of fog rolling across the graveyard. Add a small crow perched on a branch for extra atmosphere. Because graveyard scenes contain several details, they look best on longer nail shapes such as almond or coffin. On short nails, choose only two elements, such as a tree and one tombstone, to keep the artwork clear.
7. Spooky Tree With Glowing Eyes
If you want your Halloween spooky nail tree to feel a little alive, add glowing eyes. Paint a black or dark green base and draw a tree with a wide trunk. Then place two small yellow, orange, or glow-in-the-dark dots on the trunk so that it looks like something is watching from within.
This design is playful and creepy at the same time. For a stronger effect, add a curved line beneath the eyes to suggest a jagged mouth, turning the tree into a haunted character. Glow-in-the-dark polish is especially fun here, since the eyes light up after the lights go out. Use a thin brush to keep the dots small and evenly spaced. You can repeat the same eyes on every nail or hide them on only one tree for a surprise detail.
8. Blood-Red Sky and Black Branch Nails
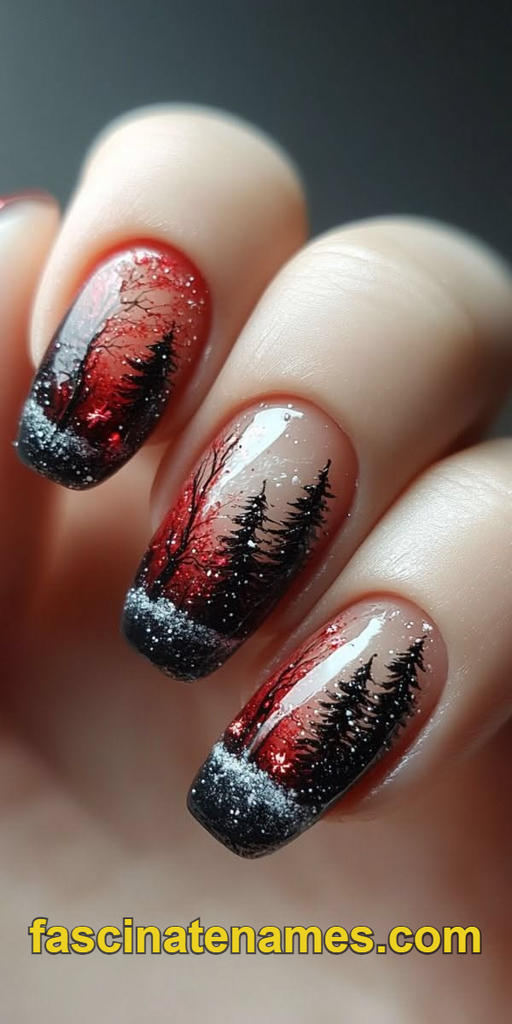
For a truly horror-movie look, pair black branches with a blood-red background. Sponge a bright red polish onto the nail, then blend darker burgundy or black toward the edges to create a stormy, ominous glow. When the base is dry, draw the black tree in front of the red sky.
The strong contrast makes the branches stand out sharply, and the whole manicure feels dramatic. To add drama, flick a few tiny red dots near the cuticle so that they look like splatter. A glossy top coat gives the red a wet shine that suits the theme. This design looks stunning on stiletto and coffin nails, where the long canvas lets the branches reach upward. If you prefer a slightly softer look, try a deep wine shade instead of bright red.
9. Minimalist Branch Line Art
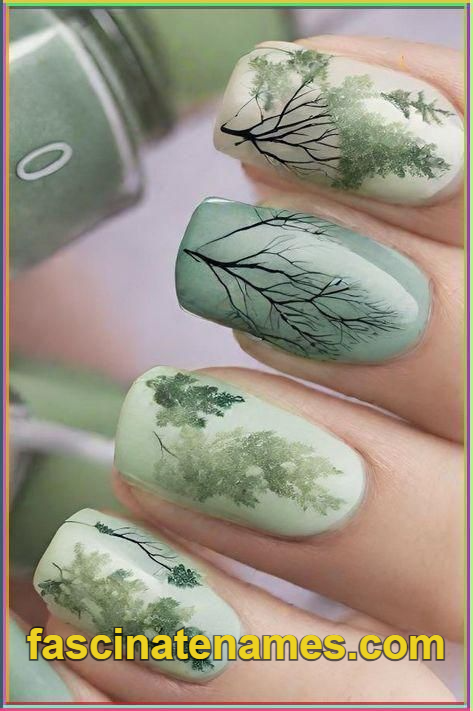
Not every spooky tree nail needs a full scene. Minimalist branch line art uses just a thin black or dark gray branch drawn across a sheer nude, pale gray, or soft white base. The branch can start at the corner of the nail and stretch across it, with a few small twigs breaking off.
This look is understated and elegant, so it works well in offices and other places with dress codes. You can also add a tiny crescent moon or a single small bird for a subtle Halloween touch. Because the design uses a lot of negative space, it grows out gracefully and is easy to fix if you make a mistake. It is also an ideal starting point for beginners who want to practice line control before trying larger scenes.
10. Matte and Chrome Spooky Tree Nails
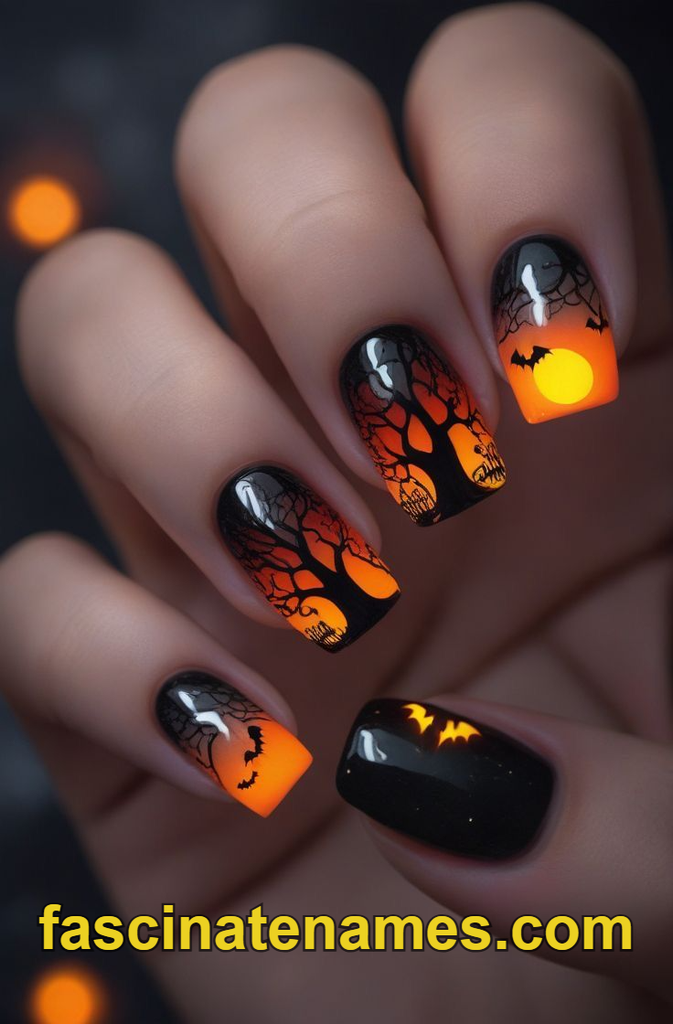
Finishes can change the personality of a tree manicure. A matte black base with glossy black branches creates a subtle, textured effect that only appears when light hits the nail. It is easy to achieve by painting the whole nail with matte top coat, then drawing the branches with a glossy top coat or glossy black polish.
Chrome adds a more glamorous twist. Silver or gunmetal chrome branches on a dark base look like frost-covered limbs under moonlight. You can also use holographic or purple chrome powder for a magical, witchy look. Chrome powder typically works best over a gel base, so it is worth doing this design as a gel manicure. Keep the rest of the design simple, because a shiny tree already draws plenty of attention.
11. Best Colors for Spooky Tree Nails
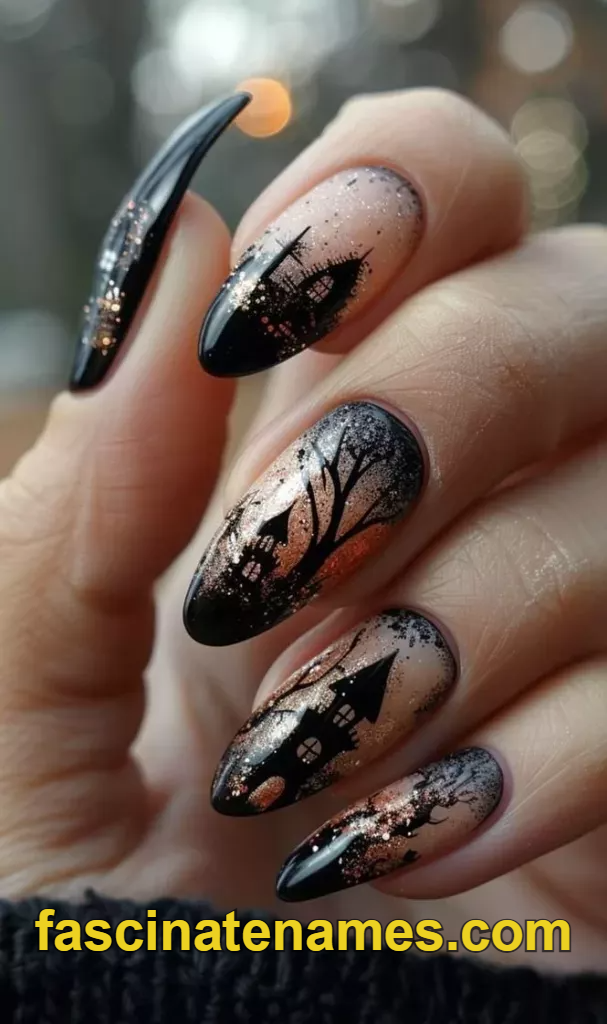
Color choice sets the whole mood. Black is essential for the tree itself, but the background is where you can experiment. Orange and purple create a classic sunset, while gray and white make a foggy, ghostly sky. Midnight blue and black suggest a moonlit night, and deep red gives a horror-movie glow.
For accent details, choose pale yellow for the moon, silver for stars, and neon green for a toxic, slime-like glow. If you like a softer, pastel goth mood, try lavender, dusty pink, or mint with black branches. Limit yourself to two or three background colors so the tree remains the star. Rich, dark shades tend to look best on all skin tones, while bright orange and violet add energy on deeper complexions and warm undertones.
12. Best Nail Shapes and Lengths for Tree Designs
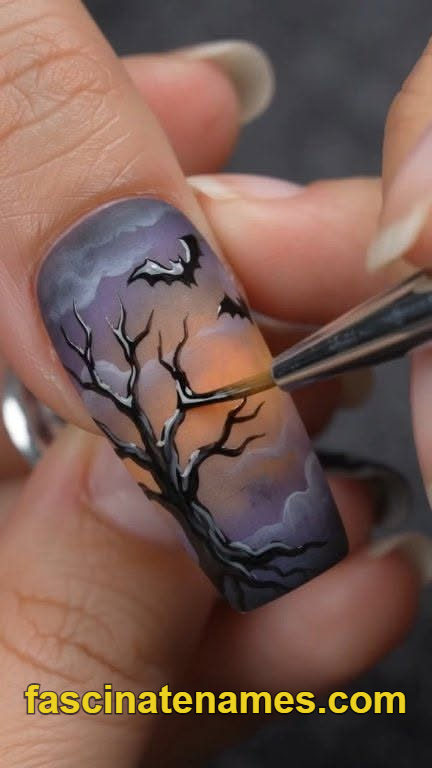
Nail shape affects how a tree looks on the finished manicure. Long almond, coffin, and stiletto nails offer a tall canvas, which suits trunks that stretch upward and branches that fan out. These shapes are ideal for full scenes with a moon, tombstones, and multiple trees.
Square and squoval nails are more practical for daily wear, and they suit smaller, simpler tree designs. Short nails can still carry great tree art if you keep it minimal. Draw a single branch across the nail or place a small tree at the tip. Always choose a length that you can use comfortably for typing, cooking, and everyday tasks. A well-planned design on a short nail often looks cleaner than a crowded one on a long nail.
13. Tools and Supplies You Need
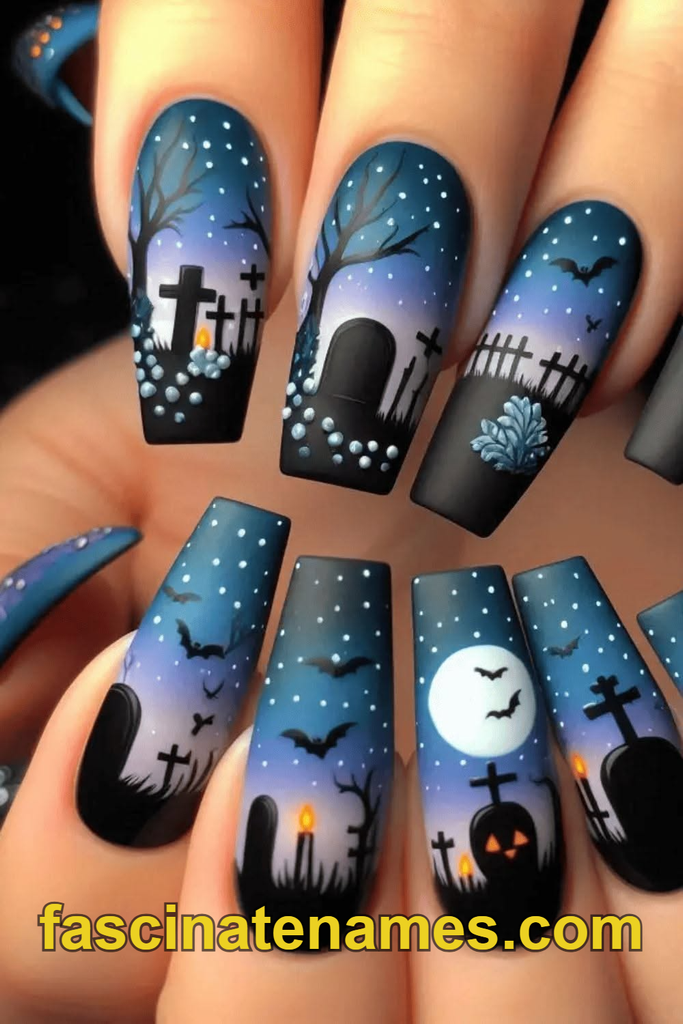
You do not need an entire salon kit to create a Halloween spooky nail tree. The most important tool is a fine detail or striping brush, which lets you draw thin, tapered branches. A dotting tool helps you create moons, eyes, and stars, and a makeup sponge is perfect for gradients and fog.
You will also need a base coat, a top coat, black polish, and your chosen background colors. Keep acetone and small cotton swabs nearby for cleaning edges. A palette, such as a piece of foil or plastic, is helpful for holding small amounts of polish while you work. If you use gel, add an LED lamp and a gel-safe cleanser. Optional extras include nail tape, rhinestones, chrome powder, and stamping plates with tree designs. Store everything together so that you are ready to create whenever inspiration strikes.
14. Step-by-Step: How to Draw a Spooky Tree on Your Nails
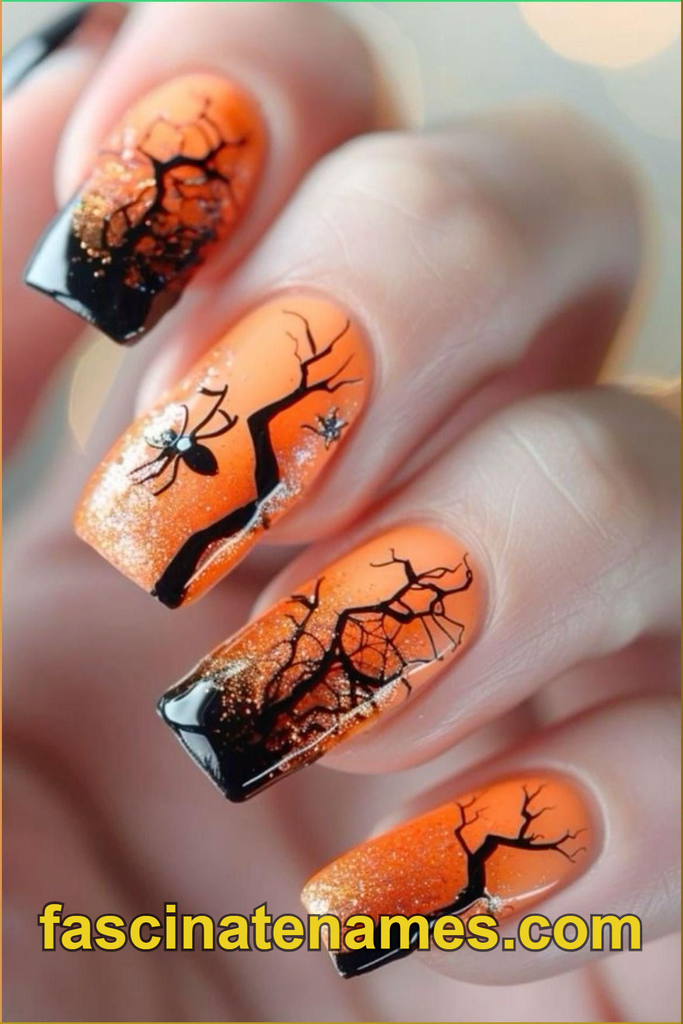
Start with clean, dry nails and apply a base coat. Paint your background color or gradient, then let it dry completely. Drawing on tacky polish drags the brush and ruins the lines.
Place a small drop of black polish on your palette and thin it slightly if it feels too thick. Dip the tip of the brush and paint the trunk first, starting from the bottom and pulling gently upward. From the trunk, draw two or three main branches, then add smaller twigs that split from them. Keep your hand light and let the lines taper naturally. Add extra details such as a moon, bats, or tombstones. Finally, seal the design with a top coat, taking care not to drag the brush across the black lines, or they may smear.
15. Sponge Technique for Foggy and Sunset Backgrounds
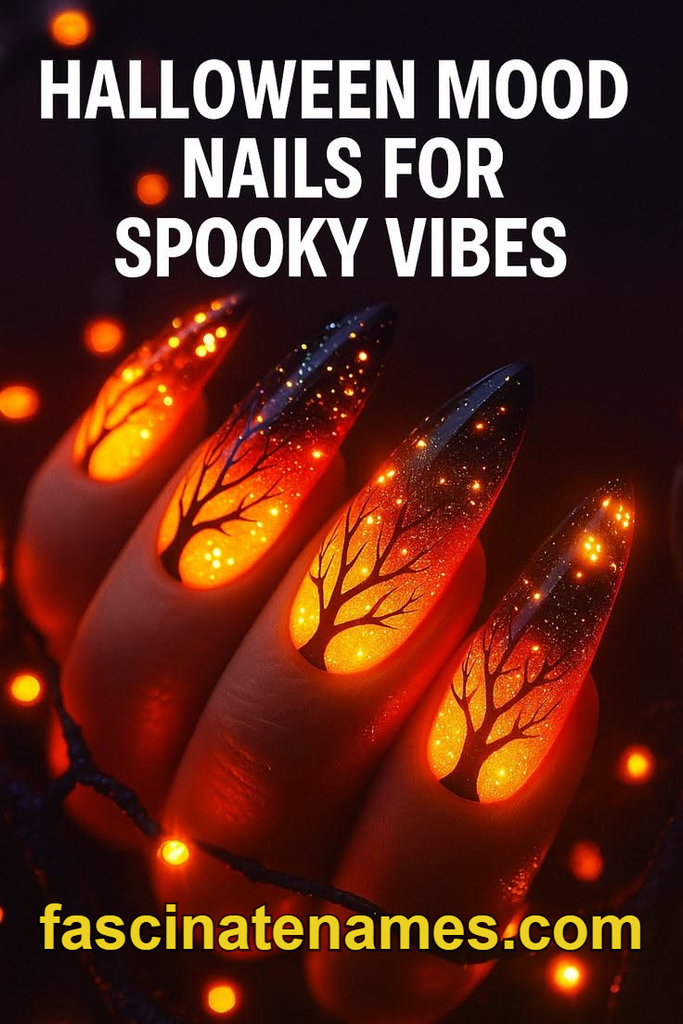
The sponge technique is one of the easiest ways to make your tree nails look professional. Cut a small piece of makeup sponge and apply stripes of two or three polish colors side by side on it. Then press the sponge onto your nail with a gentle dabbing motion.
For a sunset, place orange near the tip and purple near the cuticle. For fog, tap sheer white polish over a gray base. Repeat the dabbing two or three times to build opacity and blend the colors. Clean up any polish on your skin with a small brush dipped in acetone. Sponge gradients work with both regular and gel polish. If you use gel, cure between layers so the colors stay in place and the surface remains smooth.
16. Tips for Beginners Who Can’t Freehand
If drawing thin branches feels intimidating, there are several shortcuts. A toothpick dipped in black polish can draw fine lines with more control than a thick brush. You can also start with a simple “Y” shape and add branches gradually, instead of trying to plan the whole tree at once.
Nail stickers and water decals with tree silhouettes are another easy option, and they require no drawing at all. Stamping plates let you press a ready-made tree pattern onto the nail using a stamper and scraper. Practice on a piece of paper or an old nail tip before working on your real nails. Remember that imperfect trees look natural, so small wobbles are not mistakes. They add to the spooky, twisted charm.
17. Gel, Regular Polish, Press-Ons, or a Nail Tree Practice Stand?
Choosing the right type of manicure depends on your schedule and skill level. Regular polish is inexpensive and easy to remove, but it takes longer to dry and chips sooner. Gel polish lasts about two to three weeks, gives you time to fix mistakes before curing, and holds detailed lines beautifully.
Press-on nails are excellent for Halloween because you can paint your tree designs in advance and apply them in minutes. They are also convenient if you only want the look for one night. If you are learning, consider a nail practice stand, which some people call a nail tree. It holds several nail tips at once, so you can rehearse branches and gradients without painting your own hands. This is a helpful way to build confidence before you commit to a full set.
18. How to Make Your Spooky Tree Nails Last
A long-lasting manicure starts with good preparation. Push back your cuticles, lightly buff the surface of your nails, and wipe them with alcohol to remove oil. Apply a thin base coat, then paint your background in thin layers instead of one thick coat.
Once your artwork is dry, seal the free edge of each nail with the top coat to help prevent chipping. Use a quality top coat and reapply a thin layer every few days if you wear regular polish. Wear gloves when washing dishes or cleaning, and avoid using your nails as tools. Apply cuticle oil daily to keep the skin flexible and healthy. Fine branch lines can wear faster than solid color, so keep a small bottle of black polish for quick touch-ups.
19. Nail Care Before and After Halloween
Healthy nails give you a better canvas for detailed art. In the days before your manicure, moisturize your hands and apply nourishing cuticle oil. Keep your nails filed and smooth so that the polish applies evenly and the design stays neat.
When Halloween is over, remove your design gently. For gel, use acetone-soaked cotton and foil wraps instead of scraping, since scraping can peel layers from the natural nail. Afterward, wash your hands, moisturize, and give your nails a short break. Use a strengthening treatment or an oil containing jojoba or vitamin E to restore flexibility. Resting your nails between manicures helps them stay strong and ready for the next season’s design, whether it is autumn leaves or winter frost.
20. Frequently Asked Questions About Halloween Spooky Nail Tree Designs
Are spooky tree nails hard to do? Not really. Start with a simple branch on one accent nail, or use stickers and stamping plates if you don’t want to freehand.
What color should I use for the tree? Black is the classic choice because it contrasts with most backgrounds. Silver chrome and dark gray also work well.
Can I wear tree nails to work? Yes. A minimalist branch line on a sheer base is subtle enough for most workplaces.
When should I get them done? One to two weeks before Halloween keeps the design fresh, but tree designs also suit the rest of autumn.
What is a nail tree? It can mean a spooky tree design, or a practice stand that holds nail tips for practicing.
Final Thoughts
A Halloween spooky nail tree is a striking way to bring the season’s haunted mood to your fingertips. Pick a background you love, draw a few twisted branches, and let the moonlight, mist, or glowing eyes tell the story. Start simple, enjoy the process, and remember that a slightly crooked tree is exactly what makes it look haunted.