Drawing realistic hair can seem challenging, but with the right techniques and practice, you can bring life to your portraits. Hair isn’t just a part of your drawing it adds depth, character, and realism. In this guide, we’ll break down the process into 5 simple steps so you can master hair drawing like a pro.
1. Understanding Hair Structure and Flow

Before picking up a pencil, it’s essential to understand how hair naturally behaves. Hair grows from the scalp in clumps, following specific directions depending on the head shape and hairstyle. Observing references carefully helps you see these patterns. Straight hair flows differently from curly or wavy hair, and ignoring the natural flow can make your drawing look flat. Take time to sketch the basic shape of the hair first, keeping the flow in mind it’s the foundation of realism.
2. Start with Light Guidelines
Once you understand the flow, lightly sketch the hair outline using a soft pencil. Don’t try to draw individual strands at this stage; focus on the overall shape, volume, and major sections. Light guidelines act as a roadmap, showing where highlights and shadows will fall. This step is crucial because it prevents your drawing from looking messy later. Remember, hair has layers, so mapping out the main sections first will make shading much easier.
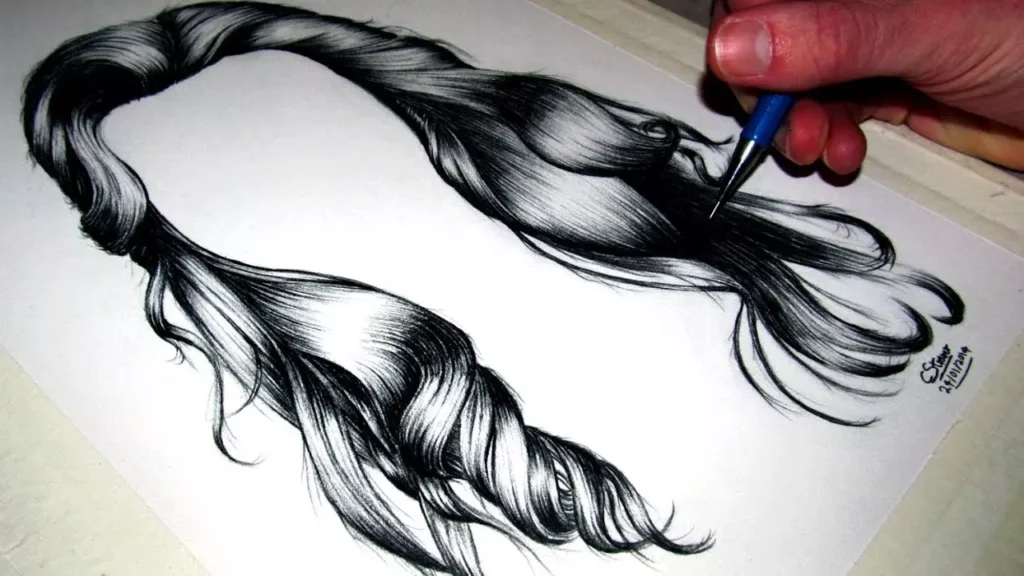
3. Layering and Shading Hair
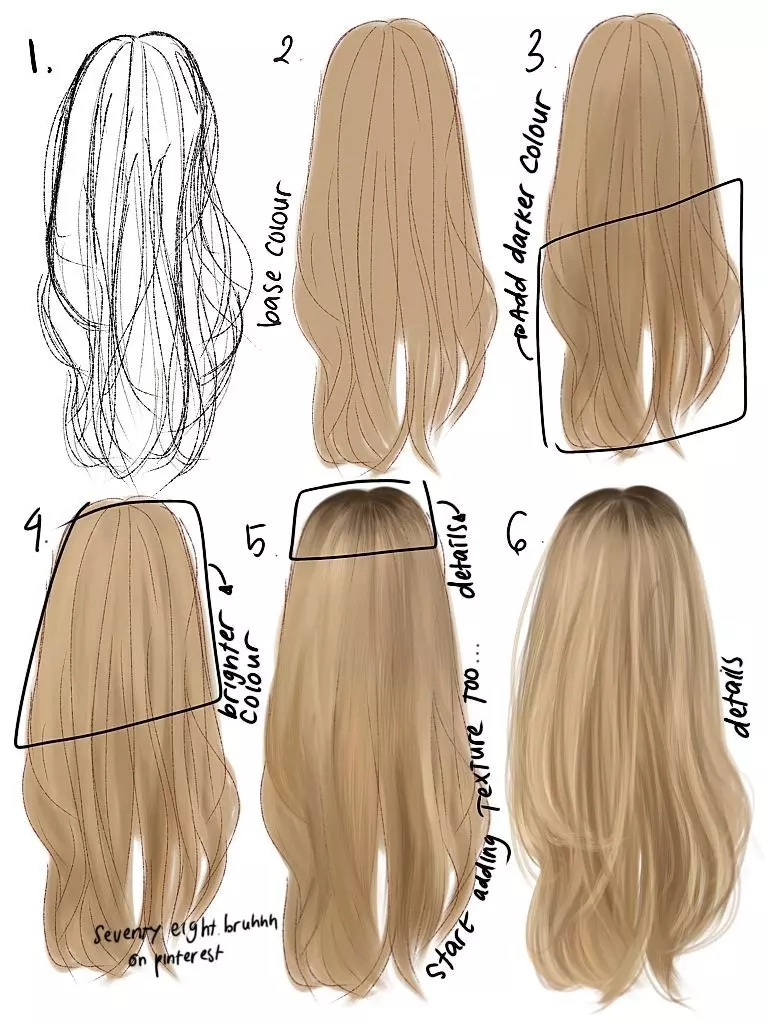
Shading is where your hair truly comes to life. Start with light strokes and gradually build layers to create depth. Pay attention to the light source—areas that catch light should remain lighter, while shadows give hair dimension. Use techniques like cross-hatching or soft blending to mimic natural hair textures. Layering helps to avoid a flat appearance and gives the impression of individual strands without drawing each one separately.
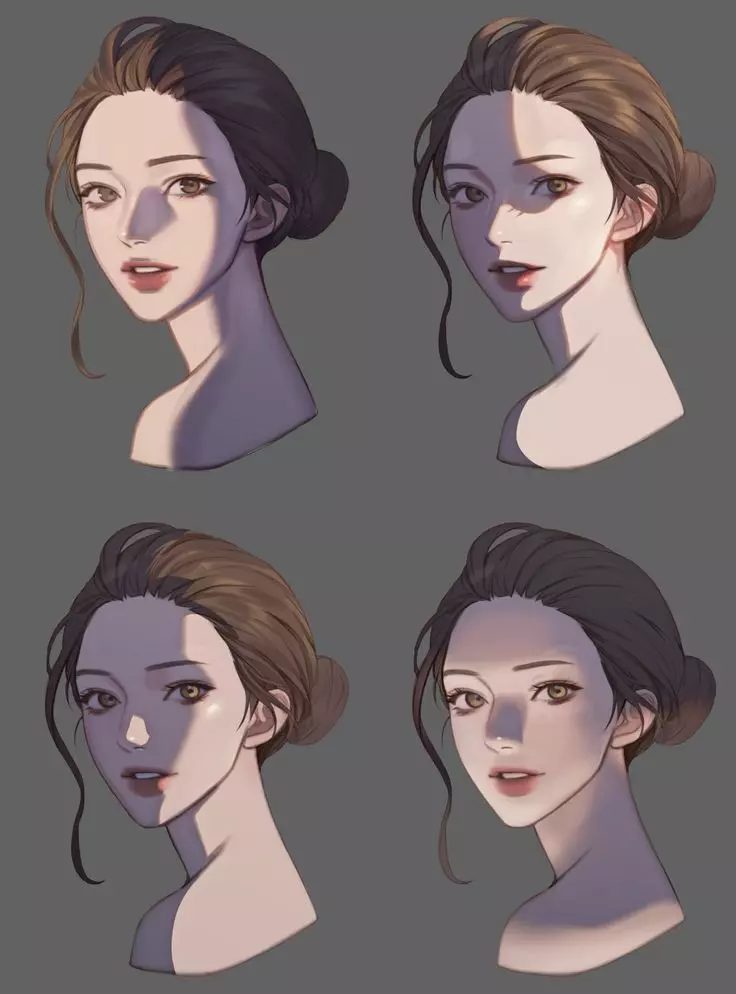
4. Adding Details and Texture
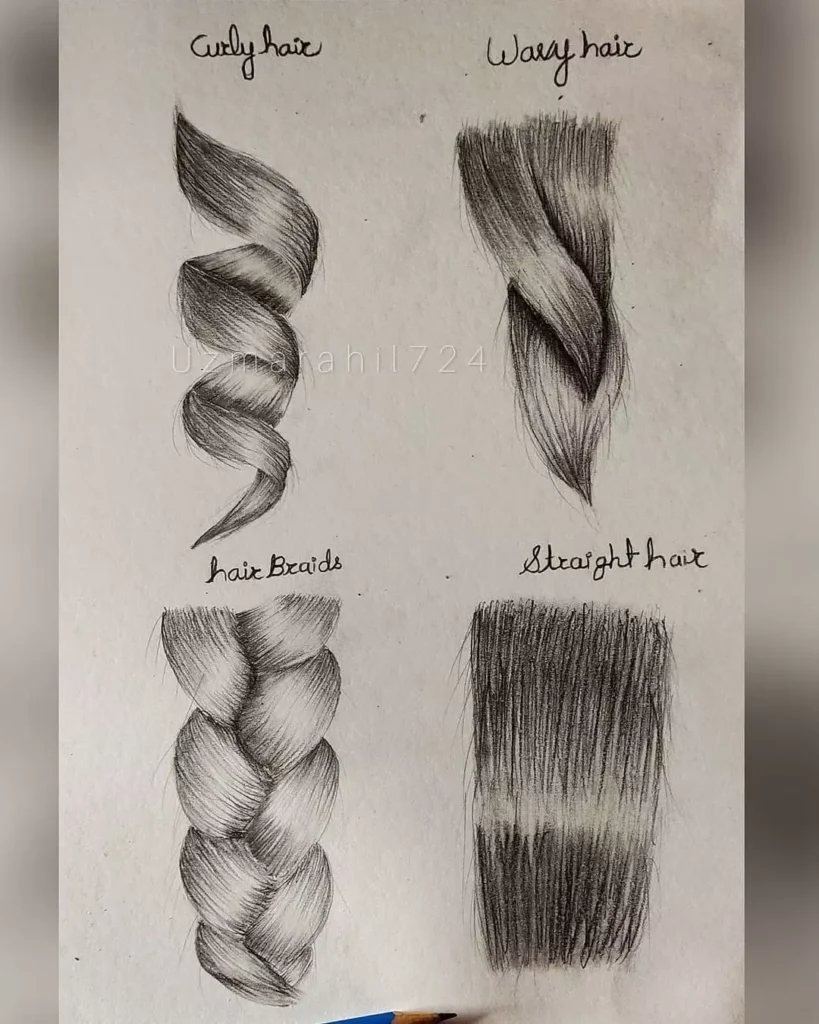
After the basic shading, it’s time to add finer details. Draw a few individual strands in key areas, like around the edges or where the hair parts, to make it look more realistic. Vary your pencil pressure to create thinner and thicker lines, mimicking natural hair. You can also use an eraser to lift highlights, creating the illusion of shine. The key here is subtlety—too many detailed strands can make hair look unnatural.
5. Finishing Touches and Refinement
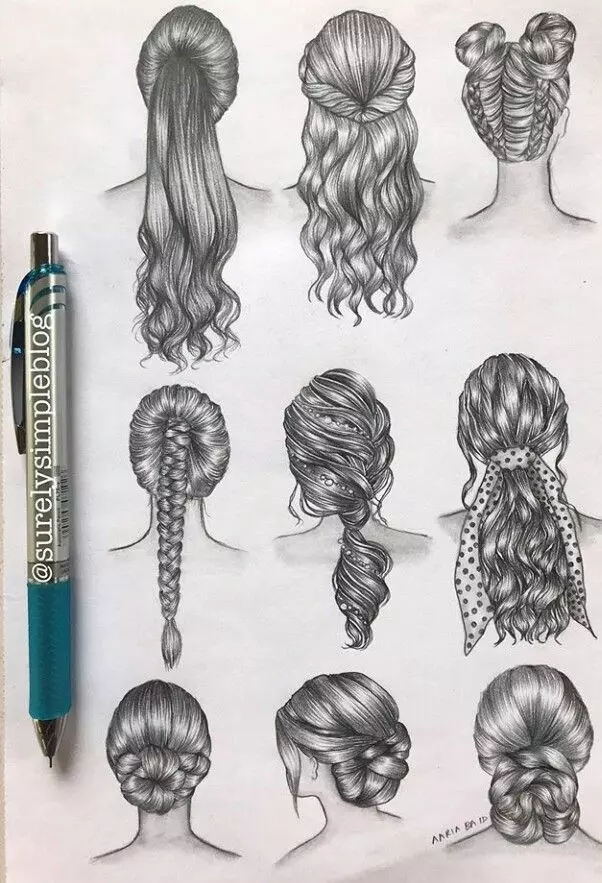
The final step is refining your drawing to achieve a polished look. Step back and check for balance in highlights, shadows, and overall shape. Blend any harsh lines gently to make transitions smooth. Add small stray hairs to enhance realism, but avoid overdoing it. A well-refined hair drawing should feel soft, flowing, and natural, giving your portrait life and personality.
FAQs
1. How long does it take to master drawing hair?
It varies for each artist, but with regular practice, you can see noticeable improvement in a few months. Patience and consistent effort are key.
2. What pencils are best for hair drawing?
A range of pencils from 2H to 6B works best. Hard pencils (H, 2H) are great for light lines and details, while soft pencils (B, 2B, 4B, 6B) help with shading and depth.
3. Should I draw every hair strand?
No need to draw each strand. Focus on sections and layers first, then add a few fine strands in key areas for realism.
4. How do I make hair look shiny?
Use an eraser to lift highlights in areas where light hits naturally, and combine it with smooth shading to create realistic shine.
5. Can I draw realistic hair without references?
References are very helpful, especially for learning flow, texture, and lighting. Once confident, you can try drawing hair from imagination.
Conclusion
Mastering realistic hair drawing takes patience, observation, and practice. By understanding hair structure, sketching guidelines, layering, adding texture, and refining your work, you can create hair that looks natural and full of depth. Keep practicing with different hairstyles, lighting, and textures, and soon you’ll find drawing hair easier and more enjoyable.

Alexander Smith is an accomplished blogger with years of experience in crafting engaging and insightful content. Known for his expertise and passion for storytelling, Alexander brings a unique perspective to Fascinate Names, captivating readers with his thoughtful analysis and fresh ideas. His extensive background in digital media and writing makes him a valuable voice in the blogging community.