Drawing flowers is one of the most popular subjects in art because of their natural beauty, variety, and expressive possibilities. Whether you are a beginner discovering sketching for the first time or an experienced artist trying to refine your floral illustration skills, flower drawing offers endless creative inspiration. In this 1000-word guide, you will learn the basics of drawing flowers, techniques to improve your line work, ways to add shading, and tips for creating realistic and stylized floral art.
1. Understanding the Basics of Flower Drawing
Before starting a flower drawing, it helps to understand the basic structure of most flowers. Typically, flowers consist of petals, sepals, a stem, leaves, and a center (stamen or pistil). Observing these parts helps you create a more accurate sketch. Begin by studying real flowers or reference photos. Look closely at shapes, curves, symmetry, and spacing.
Key Data:
- Petal count varies: Roses (20+), Sunflowers (30–50), Tulips (6).
- Shapes differ: Round, pointed, heart-shaped, or layered.
- Symmetry types: Radial (sunflower), bilateral (orchid).
2. Tools and Materials You Need
Although flower drawing can be done with any pencil and paper, certain tools enhance the final artwork. Good materials allow smoother shading and richer textures.
Recommended Tools:
- Graphite pencils: HB for outlines, 2B–8B for shading.
- Smooth paper: 120–200 GSM for better blending.
- Fine-liners: 0.1–0.5 mm for ink outlines.
- Colored pencils or watercolors (optional) for adding color.
Investing in quality tools can significantly improve the level of detail in your drawings.
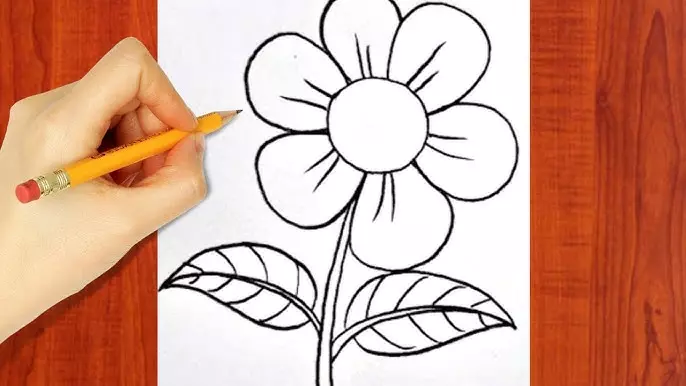
3. Step-by-Step Method for Drawing a Simple Flower
To make flower drawing easier, break down the process into steps:
- Start with basic shapes – Draw a circle for the center and light oval shapes for petals.
- Outline petals – Using curved lines, refine each petal’s edges.
- Add petal details – Sketch gentle lines from the center outward to represent texture.
- Draw the stem and leaves – Add a slightly curved stem and symmetrical leaves.
- Shade and finalize – Deepen shadows, add highlights, and erase unnecessary lines.
This method works for daisies, sunflowers, and many beginner-friendly flowers.
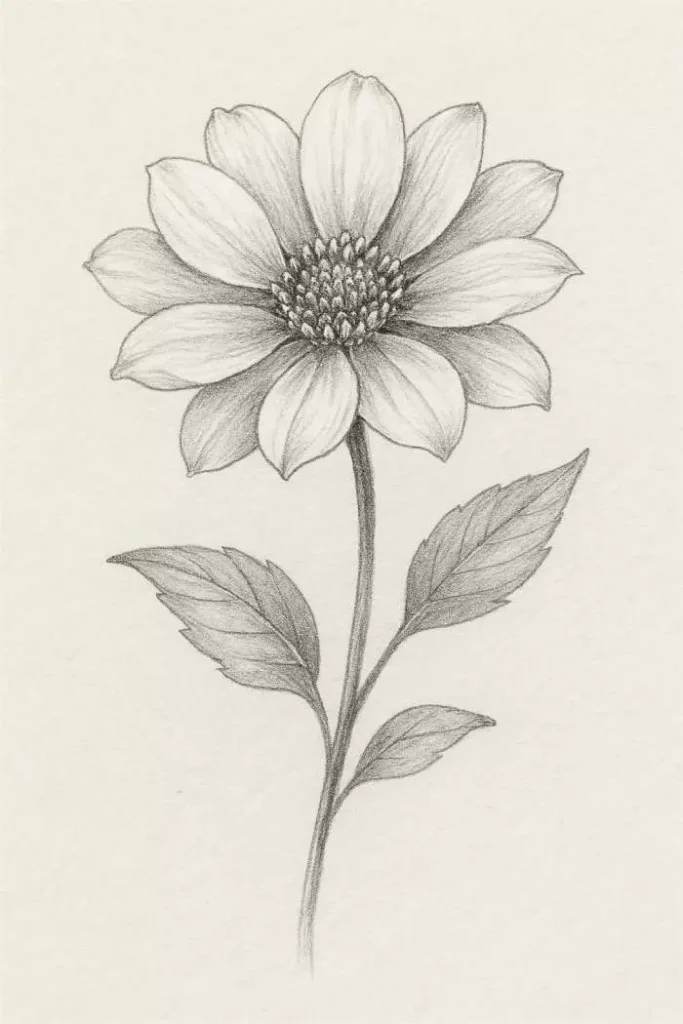
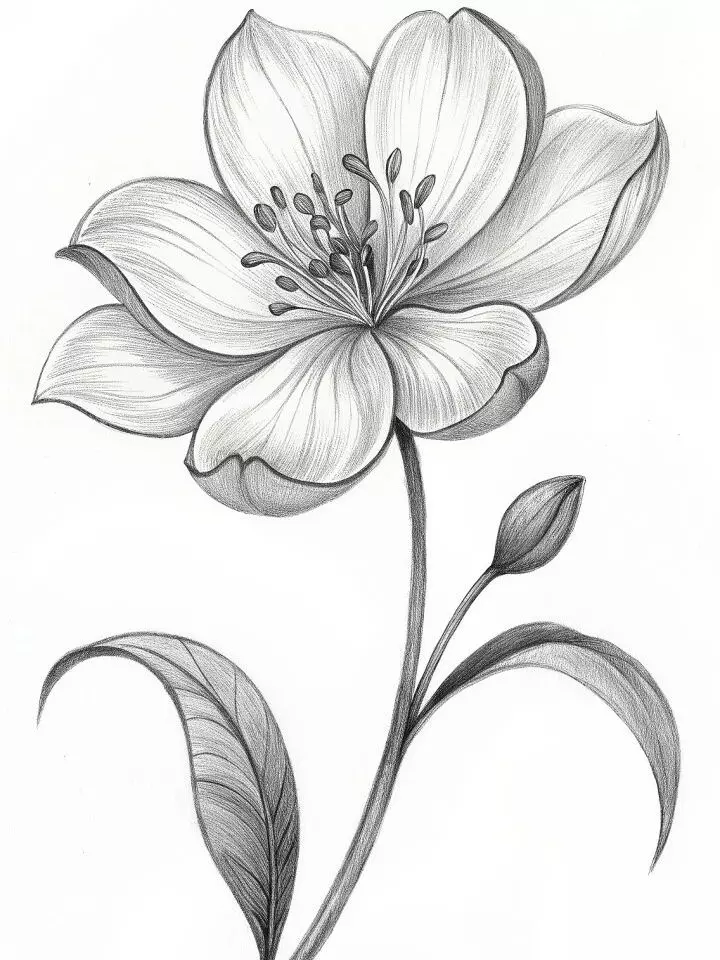
4. How to Draw Realistic Flowers

Realistic drawing requires attention to shading, texture, and depth. Observe where the light hits and where shadows form. Use soft, controlled strokes to create smooth gradients.
Realism Tips:
- Layer shading gradually, starting from light to dark.
- Blend lightly using a blending stump or tissue.
- Add depth by darkening areas behind overlapping petals.
- Use reference images for accurate proportions.
Realistic drawings may take longer but result in stunningly lifelike floral art.
5. Popular Flowers to Draw for Practice
Some flowers are easier for beginners, while others challenge advanced artists. Here’s a helpful guide:
| Flower Type | Difficulty Level | Notes |
|---|---|---|
| Daisy | Easy | Simple shapes, great for beginners |
| Sunflower | Medium | Many petals but repetitive pattern |
| Rose | Hard | Layered petals, requires patience |
| Tulip | Easy | Smooth curves, fewer details |
| Orchid | Medium | Complex symmetry |
Practicing different flower styles expands your creativity and skill.
6. Adding Shading and Highlights
Proper shading brings your flower drawing to life. Identify the light source and shade accordingly.
Shading Techniques:
- Hatching & Cross-hatching for texture.
- Stippling for delicate, soft shadows.
- Blending for smooth, realistic tones.
- Contrast adjustment by deepening shadows and cleaning highlights.
Use an eraser to lift graphite for natural highlights on petals.
7. Stylized vs. Realistic Flower Drawings
You don’t always have to draw realistically. Many artists prefer stylized, abstract, or cartoon-like flowers.
Stylized Flowers:
- Use bold outlines.
- Simplified shapes and patterns.
- Great for decorative art, logos, and patterns.
Realistic Flowers:
- Require shading and fine details.
- Use subtle lines and gradients.
- Ideal for botanical illustration.
Understanding both styles helps you choose the right one for your project.
8. Using Color in Flower Drawings
Adding color makes your floral illustrations vibrant. You can use colored pencils, watercolor, markers, or digital tools.
Coloring Tips:
- Start with light layers before adding bold shades.
- Combine two or more colors for realistic petal effects.
- Use cool colors for shadows and warm tones for highlights.
- Don’t forget to color stems, leaves, and backgrounds.
Color adds emotional expression and aesthetic appeal to your artwork.
9. Common Mistakes and How to Avoid Them
Beginners often make similar mistakes, but recognizing them helps you improve faster.
Mistakes to Avoid:
- Drawing petals too stiff or symmetrical – Flowers are natural and imperfect.
- Rushing details – Take time with shading and textures.
- Ignoring light source – Leads to flat, unrealistic drawings.
- Using heavy outlines in realistic art.
Correcting these mistakes elevates your drawing quality dramatically.
10. Practice Tips and Creative Ideas
Consistent practice is the key to mastering flower drawing. Try exploring different techniques and forms.
Creative Ideas:
- Draw a flower bouquet with multiple species.
- Sketch flowers from real life using plants or outdoor gardens.
- Combine flowers with butterflies or birds to create scenery.
- Create a floral mandala for symmetrical beauty.
- Try digital drawing using apps like Procreate.
Variation keeps your learning enjoyable and inspiring.
Final Thoughts
Flower drawing is a relaxing, rewarding, and highly creative activity. Whether you want to create realistic botanical art, stylized floral illustrations, or simply improve your sketching skills, practicing regularly will help you grow as an artist. With the techniques, step-by-step methods, shading tips, and creative ideas provided in this guide, you’re now well-equipped to begin or enhance your flower drawing journey. Enjoy exploring the beauty of flowers through your artwork!

Alexander Smith is an accomplished blogger with years of experience in crafting engaging and insightful content. Known for his expertise and passion for storytelling, Alexander brings a unique perspective to Fascinate Names, captivating readers with his thoughtful analysis and fresh ideas. His extensive background in digital media and writing makes him a valuable voice in the blogging community.